
软件简介
Zabbix开源系统监控工具官方版是一款非常实用的系统监视工具,该软件可以很好地帮助用户对电脑中软件的网络使用情况进行监控,其软件功能十分全面,支持强制关闭功能,让用户能够将占用大量宽带的软件关闭。有需要的的用户赶快下载体验吧。
功能介绍:
CPU负荷
内存使用
磁盘使用
网络状况
端口监视
日志监视
Zabbix开源系统监控工具软件特色
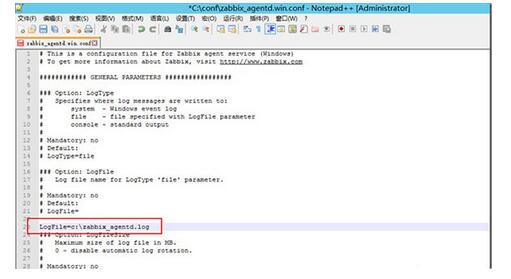
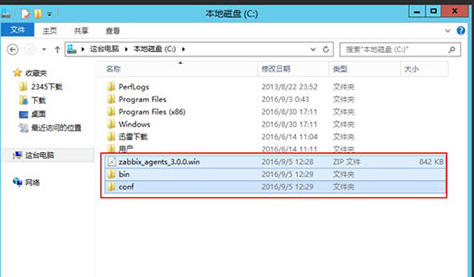
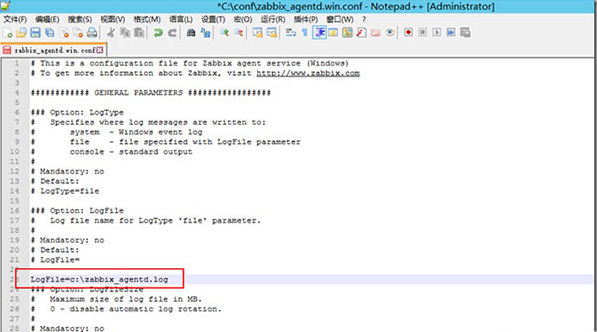
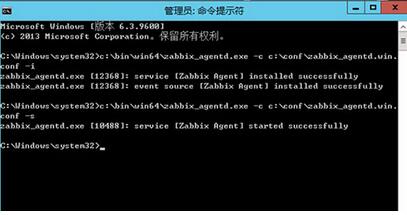
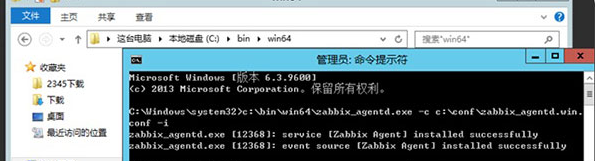
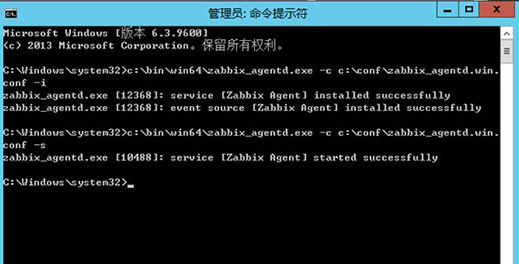
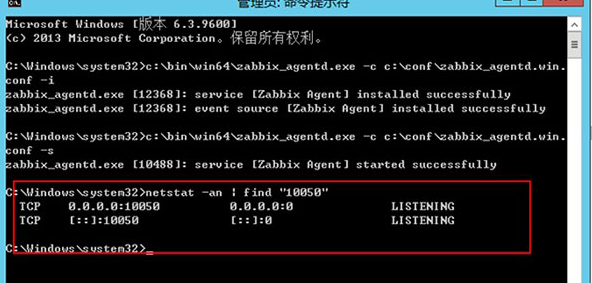
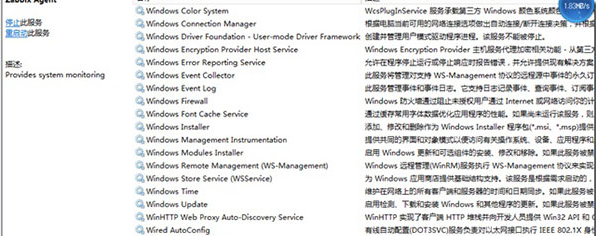
Zabbix开源系统监控工具官方电脑端使用方法


- 噜咖播放器moon player air play 1.0 官方版
- MineEarth(我的地球壁纸软件) 1.0 官方版
- 互传 3.2.6 官方版
- 装柜专家 v2.6 官方版
- 交通银行网银向导 2.2 官方版
- RPG Maker MV(RPG制作大师) 1.6.1 官方版
- Amadine Mac版 1.2 正式版
- 天柏课件录制系统 标准版
- 在线数学函数作图器 正式版
- Spybot Search and Destroy 2.4.40 正式版
- Password Depot 9.0.6 正式版
- Gow 0.5.0 官方安装版
- CAN-bus通用测试软件(CANTest) 2.34 官方最新版
- Domain Technologie Control 0.34.1 正式版
- DendroPy 3.9.0 正式版
- 小巧翻译工具 2.0
- 索尼lt26i刷机包 3.6
- 酷我音乐for Mac 1.2.3 官方版
- 纷享销客Mac版 1.7.1.1 正式版
- qBittorrent For Linux 3.3.12 正式版
- qBittorrent For Mac 3.3.16 正式版
- liquidFOLDERS(文件夹管理软件) 4.1.5 官方版
- EV加密2 4.1.7 正式版
- XtoCC Mac版 1.2.0 正式版
- OBS Mac版 27.0.1 正式版
- 阳光车生活
- 创客派
- 花海仓
- 淘多多
- 券优惠
- 药约约
- 优享花
- 农卷风
- 中拍平台
- 卡圈
- 熹妃Q传 1.8.0
- 热血龙城 4.0
- Dosenwerfen 3
- 背水一战反击 3.5
- 王者英雄五连绝世 2.6.0
- 天下霸业:在线回收 2.0.15474
- 3D全明星狂飙-极速前进 1.11.25
- 妹纸大冒险 1.3.0
- 三国塔防Lite 1.0.2
- 叫我猛将-uc版 3.2.0
- 临视
- 临死
- 临死不怯
- 临眺
- 临帖
- 临头
- 临危
- 临危授命
- 临问
- 临刑
- [BT下载][老师也疯狂][WEB-MKV/1.91GB][国语配音/中文字幕][4K-2160P][H265编码][流媒体][ParkHD小组作品]
- [BT下载][跟别人睡了][WEB-MKV/2.24GB][中文字幕][1080P][流媒体][ParkHD小组作品]
- 爆款好人
- [BT下载][天启Z:完结的起点][WebDL-MKV/5.30GB][中字][1080P][西2024新丧尸科幻]
- [BT下载][野孩子][WebDL-MKV/4.23GB][国语][2160P][中国2024超感人票房热门好片]
- [BT下载][古曼童][WEB-MKV/1.89GB][泰语/AI中英][1080p][H264编码][流媒体][RSG]
- [BT下载][导演狂想曲][BD-MKV/10.31GB][简繁英字幕][1080P][蓝光压制][SONYHD小组作品]
- [BT下载][导演狂想曲][BD-MKV/7.04GB][简繁英字幕][1080P][H265编码][蓝光压制][SONYHD小组作品]
- [BT下载][破碎之花][BD-MKV/10.77GB][简繁英字幕][1080P][蓝光压制][SONYHD小组作品]
- [BT下载][破碎之花][BD-MKV/7.49GB][简繁英字幕][1080P][H265编码][蓝光压制][SONYHD小组作品]
- [BT下载][余生有涯][第13集][WEB-MP4/4.84G][国语配音/中文字幕][4K-2160P][60帧率][HDR版本][H265][流媒体
- [BT下载][余生有涯][第13集][WEB-MKV/1.15G][国语配音/中文字幕][4K-2160P][60帧率][H265][流媒体][ColorTV]
- [BT下载][余生有涯][第13集][WEB-MP4/3.07G][国语配音/中文字幕][4K-2160P][杜比视界版本][H265][流媒体][C
- [BT下载][宴遇永安][第28集][WEB-MP4/0.31G][国语配音/中文字幕][1080P][流媒体][ColorTV]
- [BT下载][宴遇永安][第28集][WEB-MP4/0.85G][国语配音/中文字幕][4K-2160P][H265][流媒体][ColorTV]
- [BT下载][日久见君心][短剧][全24集][WEB-MKV/5.35G][国语配音/中文字幕][1080P][流媒体][BlackTV]
- [BT下载][日久见君心][短剧][全24集][WEB-MKV/13.44G][国语配音/中文字幕][4K-2160P][60帧率][HDR版本][H26
- [BT下载][爱如永昼][第02集][WEB-MKV/0.70G][简繁英字幕][1080P][流媒体][BlackTV]
- [BT下载][爱如永昼][第02集][WEB-MKV/1.13G][简繁英字幕][4K-2160P][H265][流媒体][BlackTV]
- [BT下载][遮天.年番1][第132集][WEB-MKV/0.32G][国语配音/中文字幕][1080P][H265][流媒体][BlackTV]
- 原神落霞怎么得 落霞给谁装备好
- 【超人情报站 】排位模式玩法介绍:大乱斗
- 王牌竞速跃动苏堤地图怎么玩 跃动苏堤在哪超车好
- 【超人情报站 】休闲模式玩法介绍:能源水晶
- 王牌竞速山城飞行地图怎么玩 山城飞行在哪超车好
- 角色解析趣味分析
- 原神若水武器图鉴 若水适合谁装备
- 史上最难打法? 《全民泡泡超人》超人快跑模式玩法技巧
- 王牌竞速天堑之桥地图怎么玩 天堑之桥在哪超车好
- 快速入手,新手秒变老手
- 中邮钱包 2.1.37
- 泰康泰生活 4.12.0
- 百度有钱花 5.3.5
- 豆豆钱专业版 6.3.7
- 梦见账本 2.7.2
- 快手小店商家版 2.8.51
- 度小满金融 6.8.5
- 360周转灵 1.8.89
- 360借条 1.8.90
- 脉脉 6.1.10