
软件简介
 ReplicatorG中文版是款非常好用的专业3d打印软件。ReplicatorG中文版是款且集成度最高的一款控制软件,同时它还能够实现格式转换等功能。内含全中文使用教程,使用前可参考。
需要在你的系统上安装JAVA,将模型转换成机器认识的代码需要使用到Skeinforge,它是通过python写的,所以你还需要安装Python 2.6。
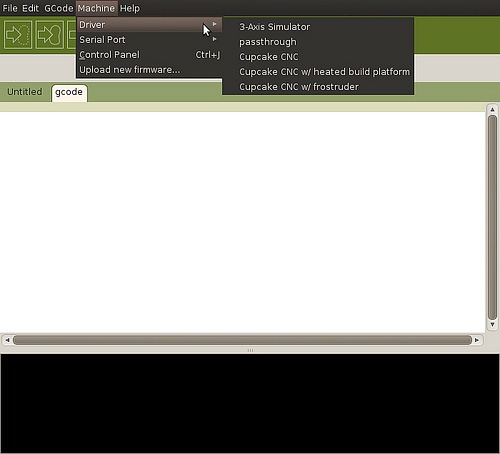
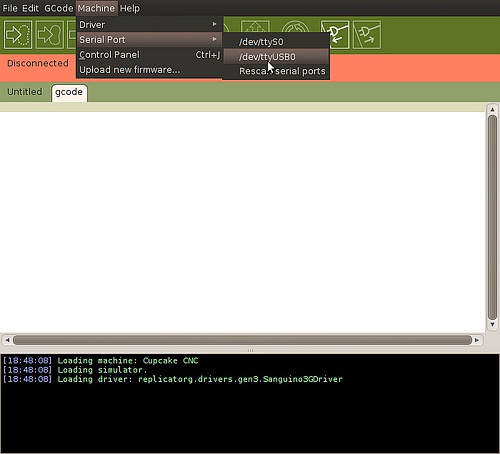
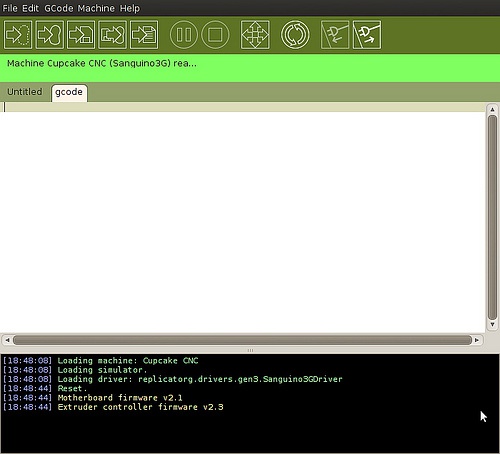
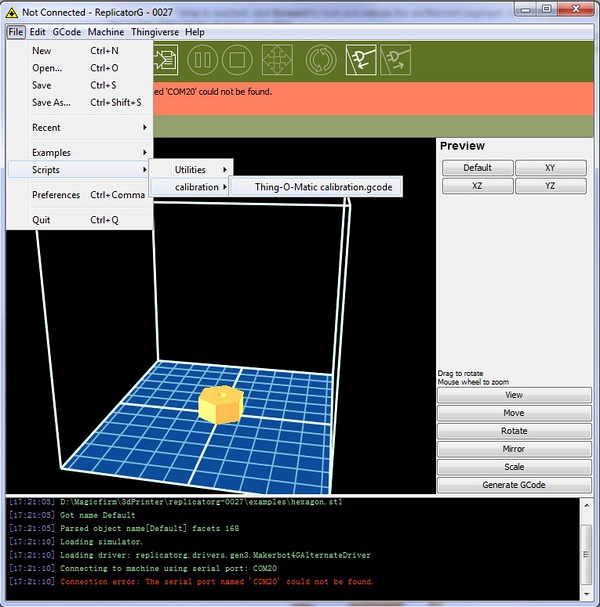
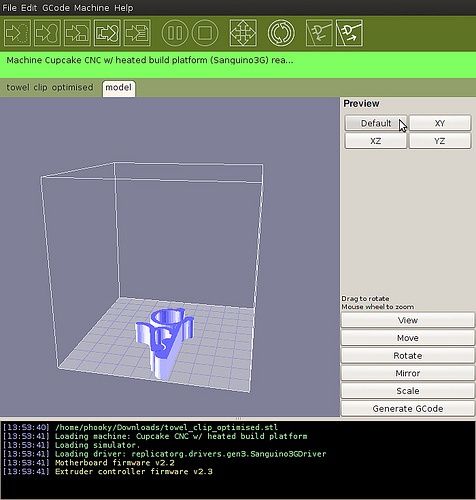
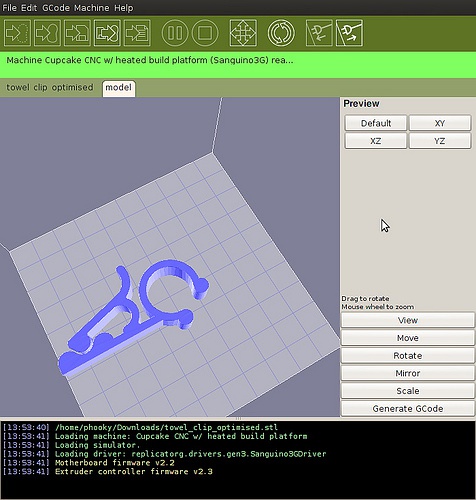
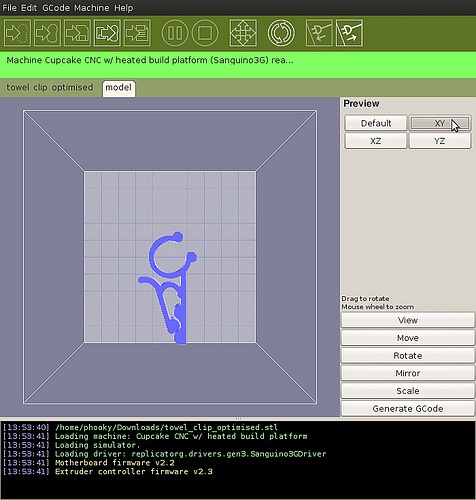
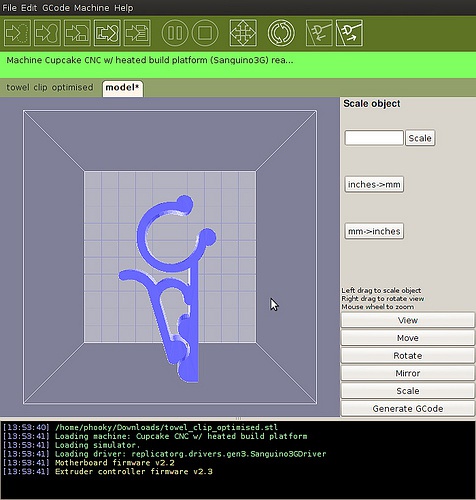
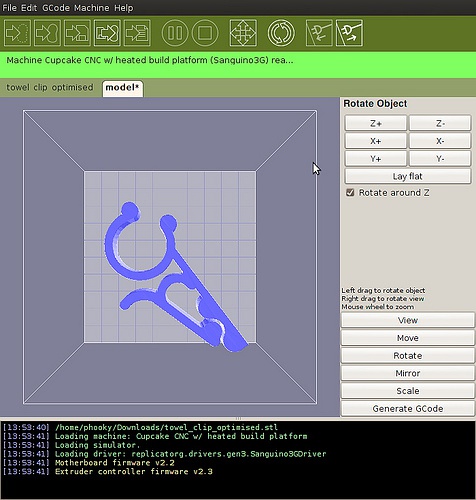
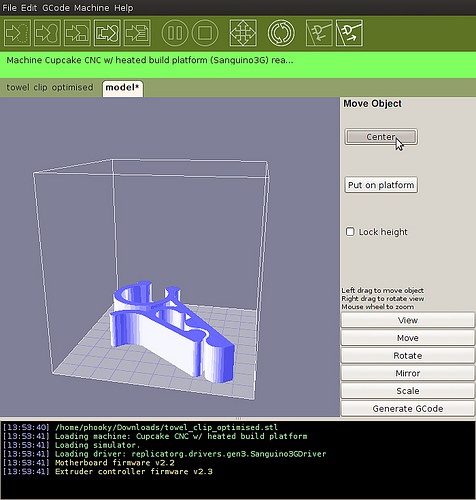
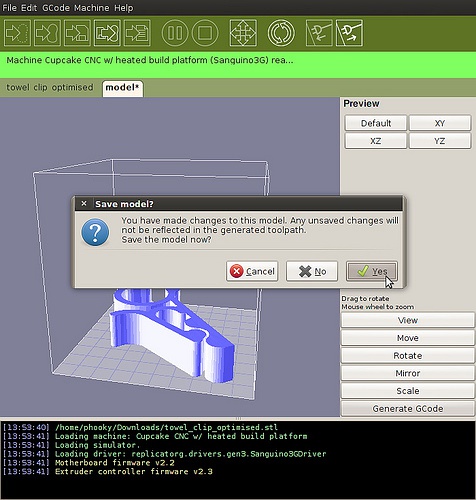
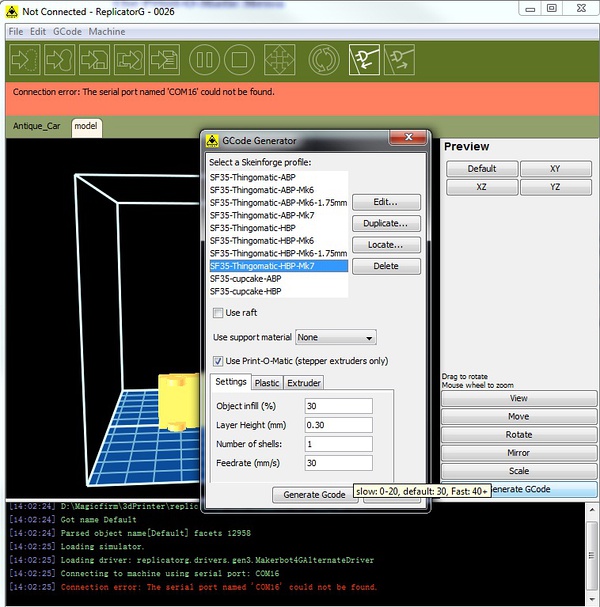
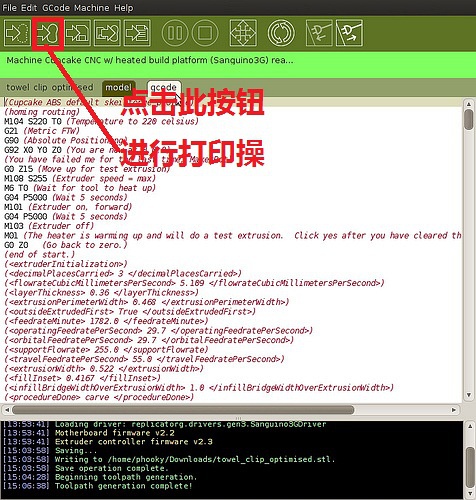
ReplicatorG官方电脑端使用方法

- 模拟人生4(The Sims 4)v1.36宠物狗的裙子MOD
- 模拟人生4(The Sims 4)v1.36四角钉镶边猫狗宠物皮项圈MOD
- 模拟人生4(The Sims 4)v1.36可爱的哈士奇宠物MOD
- 模拟人生4(The Sims 4)v1.31女士卷袖子开扣工装衬衣MOD
- 模拟人生4(The Sims 4)简约公寓改造房屋MO
- 模拟人生4(The Sims 4)无尽的冬夜荒凉山庄MO
- 模拟人生4(The Sims 4)v1.31个性麻花编尾及腰长发MOD
- 模拟人生4(The Sims 4)吸血鬼维托姐弟整容MO
- 模拟人生4(The Sims 4)仿火车客运站别墅MO
- 模拟人生4(The Sims 4)古剑2男女通用版发型MO
- 模拟人生4(The Sims 4)日式餐厅MO
- 模拟人生4(The Sims 4)仿建海盗餐厅MO
- 模拟人生4(The Sims 4)个性集装箱餐厅MO
- 模拟人生4(The Sims 4)童话风猫咪之家MO
- 模拟人生4(The Sims 4)超级购物娱乐中心MO
- 模拟人生4(The Sims 4)擎天柱豪华房屋MO
- 模拟人生4(The Sims 4)维多利亚家庭住宅V1版MO
- 模拟人生4(The Sims 4)仿平安神宫寺庙MO
- 模拟人生4(The Sims 4)海岸蓝琉璃度假宾馆MO
- 模拟人生4(The Sims 4)七色简约装饰高跟鞋MOD
- 模拟人生4(The Sims 4)条纹布木质折叠椅套装MOD
- 模拟人生4(The Sims 4)CONEJOBLANCO个性幻想风斜抹肩单袖衬衫
- 模拟人生4(The Sims 4)拉拉队长活力胸衣上衣MOD
- 模拟人生4(The Sims 4)星月馆人偶女仆长MO
- 模拟人生4(The Sims 4)星月馆人偶执事MO
- 运荔枝
- 驼城通
- 多多拉车主
- 经纬度定位
- 衡水掌上公交
- 携程商旅
- 手机号码查找
- 出境易
- 联联充电Pro
- 租租车国内租车
- 迷你世界 1.3.0
- 公主魔法换装 v1.43
- 儿童汽车涂色游戏 4.60.218c
- 纪念碑谷 2.4.4
- 奇幻祖玛 1.0
- 我的使命 6.2.8
- 黑鹰战斗机 2.3
- 防恐袭击3D 1.0
- 点心萌物语 3.0
- 消除萌怪大作战 1.1.0.00800002
- 雷1
- 雷2
- 雷暴
- 雷池
- 雷达
- 雷达站
- 雷打不动
- 雷大雨小
- 雷电
- 雷电交加
- [BT下载][分裂][BD-MKV/22.75GB][简繁英字幕][4K-2160P][HDR版本][H265编码][蓝光压制][ParkHD]
- [BT下载][拜见岳父大人][BD-MKV/17.22GB][简繁英字幕][4K-2160P][HDR+杜比视界双版本][H265编码][蓝光压制][ParkHD]
- [BT下载][摩加迪沙][BD-MKV/21.67GB][国韩多音轨/简繁字幕][4K-2160P][HDR+杜比视界双版本][H265编码][蓝光压制][ParkHD]
- [BT下载][星际宝贝史迪奇][BD-MKV/13.36GB][国英多音轨/简繁英字幕][1080P][蓝光压制][DreamHD]
- [BT下载][星际宝贝史迪奇][BD-MKV/8.00GB][国英多音轨/简繁英字幕][1080P][H265编码][蓝光压制][DreamHD]
- [BT下载][星际宝贝史迪奇][BD-MKV/17.35GB][国英多音轨/简繁英字幕][4K-2160P][HDR+杜比视界双版本][H265编码][蓝光压制][Dream
- [BT下载][Her.Obsession][WEB-MKV/4.54GB][中文字幕][1080P][流媒体][DreamHD]
- [BT下载][关于爱][WEB-MKV/3.97GB][中文字幕][1080P][流媒体][DreamHD]
- [BT下载][外出][WEB-MKV/4.40GB][中文字幕][1080P][流媒体][DreamHD]
- [BT下载][情欲边界][WEB-MKV/6.04GB][中文字幕][1080P][流媒体][DreamHD]
- [BT下载][丑闻][第98集][WEB-MKV/0.75G][中文字幕][1080P][流媒体][ZeroTV]
- [BT下载][民王R][第06集][WEB-MKV/0.76G][中文字幕][1080P][流媒体][ZeroTV]
- [BT下载][大学女生的性生活.第一季][第01-06集][WEB-MKV/5.88G][简繁英字幕][1080P][流媒体][ParkTV]
- [BT下载][大学女生的性生活.第一季][第01集][WEB-MKV/7.87G][简繁英字幕][4K-2160P][HDR+杜比视界双版本][H
- [BT下载][末代厨娘][第19-20集][WEB-MKV/4.75G][国语配音/中文字幕][1080P][流媒体][ParkTV]
- [BT下载][珠帘玉幕][第37集][WEB-MKV/0.76G][国语配音/中文字幕][1080P][流媒体][ZeroTV]
- [BT下载][留住长江的微笑][全06集][WEB-MP4/3.51G][国语配音/中文字幕][1080P][流媒体][ParkTV]
- [BT下载][真爱节拍][短剧][全08集][WEB-MKV/5.92G][国语配音/中文字幕][1080P][流媒体][ParkTV]
- [BT下载][虚构推理][全12集][WEB-MP4/4.99G][中文字幕][1080P][流媒体][ParkTV]
- [BT下载][赌你也会做][第05集][WEB-MKV/4.62G][简繁英字幕][4K-2160P][HDR+杜比视界双版本][H265][流媒体][
- 原神柯莱圣遗物选择 柯莱武器推荐
- 奶块传说法杖Ⅰ阶怎么得 传说法杖Ⅰ阶配方是什么
- 奶块传说圣杖Ⅱ阶怎么得 传说圣杖Ⅱ阶怎么铸造
- 原神提纳里圣遗物推荐 提纳里突破素材
- 奶块传说圣杖Ⅰ阶怎么得 传说圣杖Ⅰ阶怎么铸造
- 奶块传说之刺Ⅱ阶怎么得 传说之刺Ⅱ阶怎么铸造
- 光遇中秋节灯笼礼包 光遇中秋节灯笼多少钱
- 奶块传说之刺Ⅰ阶怎么得 传说之刺Ⅰ阶怎么铸造
- 奶块传说战刃Ⅱ阶怎么得 传说战刃Ⅱ阶怎么铸造
- 光遇兔子头饰怎么获得 玉兔礼包价格是多少
- 蓝海银行 3.0.16
- 利弗莫尔证券 1.9.27
- 亿欧 5.0.6
- 陕钢物流 1.1.8
- 长安金管家 1.3.14
- 多多卖房 5.20.0
- e发票企业版 2.5.0
- 星杰工程 3.10.0
- 通刷大众版 5.5.6
- 智店通 2.9.7